- Procedure
- Target pages
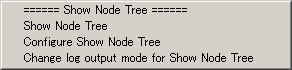
- Command Menu
- This menu is a title line. It doesn't happen at all.
- If you want to show the node tree according to the configuration, select this menu.
- If you want to configure this script, select this menu.
- This menu is for debbuging.
- Set log mode off usually.
- If you want to output script log,select this menu and click OK.
- If you want to stop script log,select this menu and click Cancel.
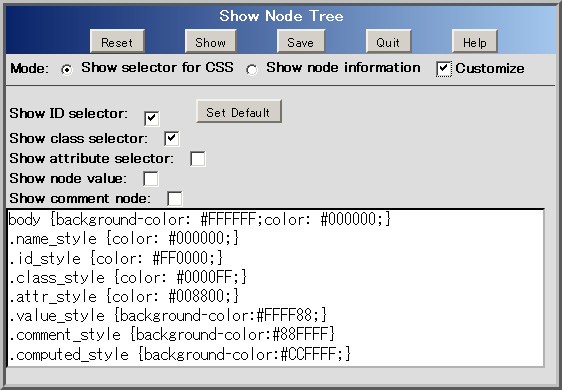
- Configuration Form
- This area is showing the name of the script.
- When you move the mouse cursor on the title area,the mouse cursor will be changed to move cursor.
- You can move the form box to another place using drag & drop.
This button initializes all form parts.
This button shows the preview for the specification.
This button closes form after saving the data.
This button closes form without saving the data.
When you click this button,this page(main site) will be shown.
When you click this button while push the shift key,this page(mirror site) will be shown.- Show selector for CSS
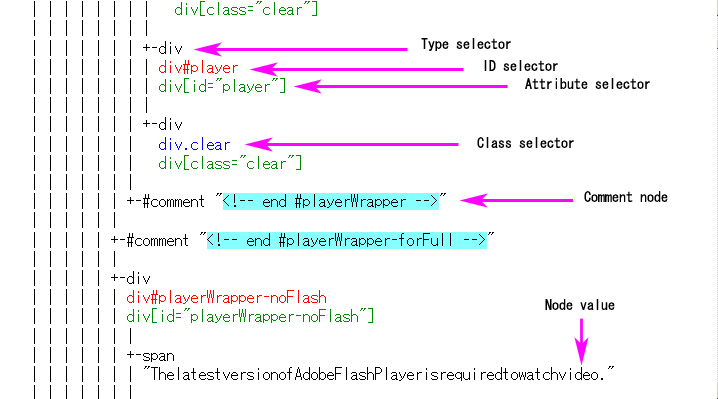
This mode shows the node tree with the selector.
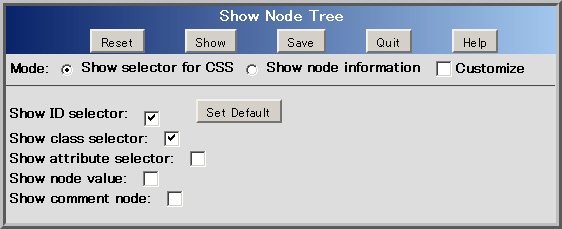
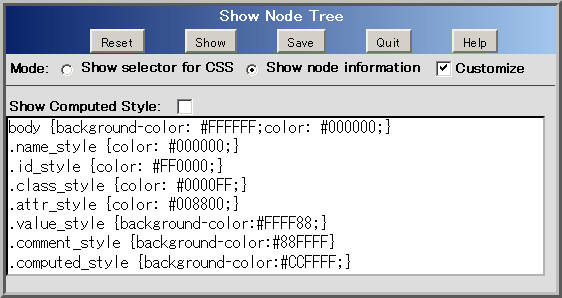
- Show node information
This mode shows the node tree with the node informations.
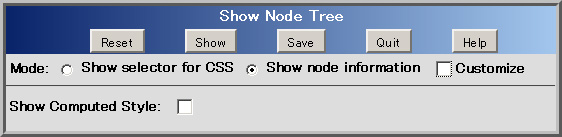
- Customize
This is an option to customize the output window.
When the check box is on,the textarea apears the bottom of the form.
When the check box is off,the textarea disapears. - You can select output selectors.
The type selector cannot be specified because it is indispensable. - Show ID selector
If you want to output the ID selector,check this check box. - Show class selector
If you want to output the class selector,check this check box. - Show attribute selector
If you want to output the attribute selector,check this check box.
If you check this check box,"include script" check box will apears. - include script
This is an option for the attribute selector.
If you check this check box,this script will include attribute having a javascript code like onmouseover="javascript:xxxxx". - Show node value
This is a display option, not selector.
If you want to output the node value,check this check box. - Show comment node
This is a display option, not selector.
If you want to output the comment node,check this check box. - Set Default
This button returns the default setting. - In this mode,it will output node names,ids,classes,attributes,text nodes and comment nodes with the value.
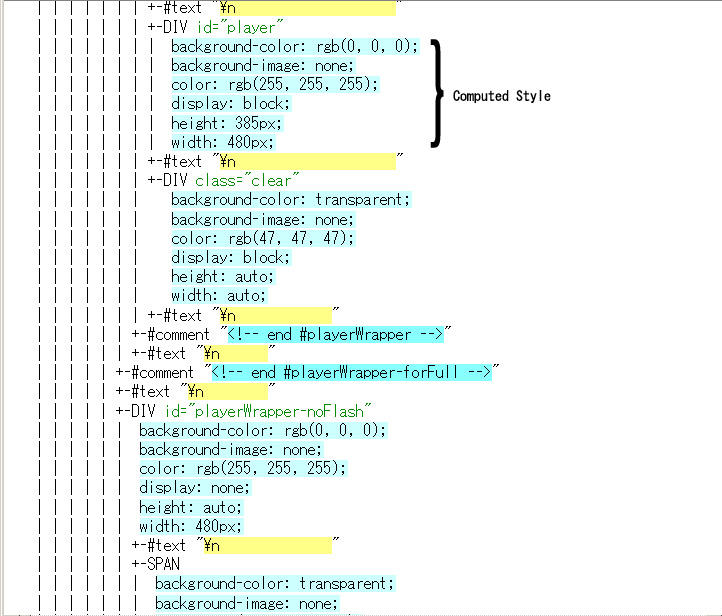
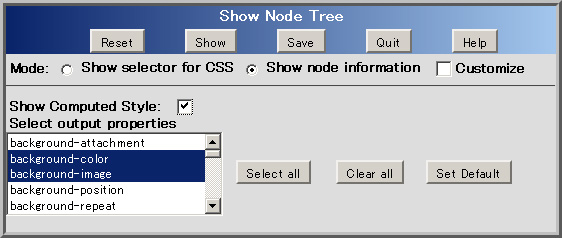
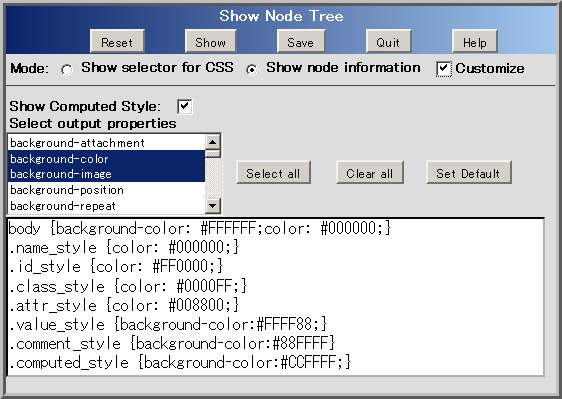
- Show Computed Style
If you want to output the computed style,check this check box.
You can select the output properties from the properties list box. - Select output properties
Select the properties what you want to output. - Select all
This button selects all properties.
But it will take a time until the output finish. - Clear all
This button clears all selection. - Set Default
This button returns the default setting. - You can enter CSS code for the output window.
- This CSS code is shared with both "Show selector for CSS" and "Show node information" mode.
- Default CSS code
body {background-color: #FFFFFF;color: #000000;}
.name_style {color: #000000;}
.id_style {color: #FF0000;}
.class_style {color: #0000FF;}
.attr_style {color: #008800;}
.value_style {background-color:#FFFF88;}
.comment_style {background-color:#88FFFF}
.computed_style {background-color:#CCFFFF;}
- .name_style
This class is used for type selectors. - .id_style
This class is used for ID selectors. - .class_style
This class is used for class selectors. - .attr_style
This class is used for attribute selectors. - .value_style
This class is used for node values. - .comment_style
This class is used for the comments in the comment nodes. - .computed_style
This class is only used for computed properties in the node informations.
Computed style means the actual computed value of the style applied currently. - If you want to move the form to the different location, do drag & drop clicking the form Title area.
- If you drop the outside of the window, it is automatically returned to the window.
- Changelog
- System Requirement
- Firefox 3.x
- I don't know about Firefox 2.x.
- Greasemonkey 0.8.x
- Related Links
- userscripts.org
- My account page
- Show Node Tree script for Greasemonkey
(1) Show the page which you want to show the node tree or informations.
(2) Select "Configure Show Node Tree" from the command menu of Greasemonkey.
(3) If you want to show the node tree with the selector, select "Show selector for CSS". Then go to (6).
(4) If you want to show the node tree with the node informations, select "Show node information". Then go to (7).
(5) If you want to customize the output window, check the Customize check box. Then go to (8).
(6) Check the selector type what you want to show. Then go to (9).
(7) Check the "Show computed style" if you want to show computed style, and select properties what you want to output. Then go to (9).
(8) Enter the CSS code for the output window into the textarea. Then go to (9).
(9) Click "Show" button to show the node tree.
(10) Click "Save" button to save the setting if you want to save it. Click "OK" button on the confirm dialog.
You can use all sites and all pages,because this script searches for the information for building a node tree from DOM.
(1) ====== Show Node Tree ======
(2) Show Node Tree
(3) Configure Show Node Tree
(4) Change log output mode for Show Node Tree
(2) Show Node Tree
(3) Configure Show Node Tree
(4) Change log output mode for Show Node Tree
(1) Title area
(2) Command Button
(3) Mode
The entered CSS is applied to the output window regardless of the state of this check box.
(4) Show selector for CSS
(5) Show node information
(6) Customize
(7) Movement
| Date | Version | Reason |
|---|---|---|
| 2009-09-01 | 1.0.3 | Changed the timing to add the configuration form into the page. |
| 2009-07-04 | 1.0.2 | Changed around Help and mouse cursor, etc. |
| 2009-06-25 | 1.0.1 | Added the mirror page and a tooltip to the Help button. |
| 2009-06-18 | 1.0 | Changed URL of the Help page. Removed the form tag from the configuration form. |
| 2009-06-06 | 0.9 | Changed background of the title area in the form. Changed the code about radio buttons. |
| 2009-05-30 | 0.8 | Added Help button. Changed log mode function. Replaced document.getElementById to $. |
| 2009-05-09 | 0.7 | Set the mouse cursor on the title area and the buttons. |
| 2009-04-29 | 0.6 | Removed the command buttons for moving the form. Supported the movement of the form by Drag&Drop instead. |
| 2009-04-19 | 0.5 | Added checking the content-type,because it was working on the text/plain type etc. |
| 2009-04-02 | 0.4 | Added computed properties. Changed the place of some functions related to the form. Etc. |
| 2009-03-18 | 0.3 | Added move button in the configuration form. |
| 2009-02-19 | 0.2 | Added configuration form. |
| 2009-01-13 | 0.1 | New creation |
(1) Browser
(2) Add-on of Firefox
(2) Add-on of Firefox
(1) Firefox
(2) Firefox add-ons
(3) userscripts.org
(2) Firefox add-ons
(3) userscripts.org
These sample image is shown by my script "Show Node Tree"
-
Sample of "Show selector for CSS"
-
Sample of "Show node information"